

How to Make a Grading Rubric (With a Worked Example)
Short answer: a good grading rubric starts with the learning goal, not the grid. Decide what you want the work to prove, split that into three to five criteria, describe four levels of quality for each one, and put a point value on every level. Then test the rubric on one real piece of student work before you use it on a whole class. This guide walks through each step, with a complete 20-point essay rubric you can copy and adapt for your own assignments.
A rubric is the single most useful grading tool a teacher owns, and it is also one of the most misunderstood. It is not a checklist, and it is not just a score table with fancy headings. A rubric is a written promise to your students: this is what good work looks like, this is how many points each part is worth, and this is how your grade will be decided. When that promise is written down before anyone starts writing, three things happen. Grading gets faster, because you are matching work against descriptions instead of re-deciding the standard on every paper. Grades get fairer, because the same description applies to the first paper and the thirtieth. And students get better, because they can see the target before they aim at it instead of guessing what you wanted after the marks are already in.
The problem most teachers hit is not that rubrics are hard to make. It is that the first rubric they build usually has too many criteria, vague descriptions, and point values that do not match what they actually care about — and then the rubric feels like more work than grading without one. The six steps below avoid all three traps, and the worked example shows what a finished rubric looks like when it is done right.
What Is a Grading Rubric?
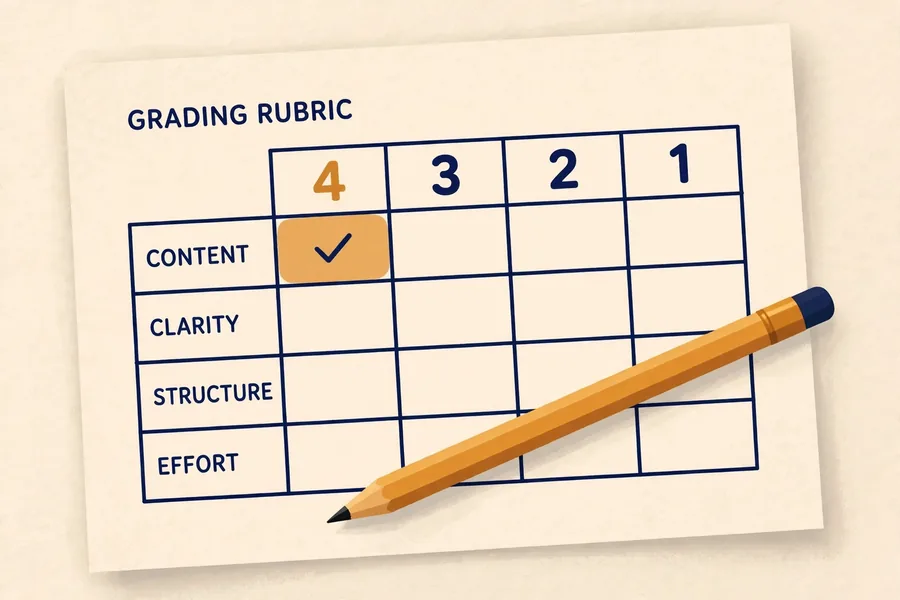
A grading rubric is a scoring guide that lists what you are judging down one side and how well a student can do it across the top. Each row is one criterion — one skill or quality you are measuring, such as content, organisation, or use of evidence. Each column is one level of quality, usually four: excellent, proficient, developing, and beginning, or simply 4, 3, 2, and 1. Each cell where a row and a column meet describes what work at that level looks like for that criterion. The teacher reads the student’s work, finds the cell that matches it for each criterion, and adds up the points.
That grid does two jobs at once. First, it turns a vague judgment — “this essay is a B” — into a set of small, checkable decisions: the content is a 3, the organisation is a 4, the evidence is a 3. Second, it explains the grade to the student without extra writing. When a student asks why they got 17 out of 20, you do not have to reconstruct your thinking from memory; you point at the rubric and show them exactly which cells they landed in.
A rubric is not the same as an answer key. An answer key lists the right answers; a rubric describes levels of quality. A multiple-choice test needs an answer key. An essay, a project, a presentation, or a lab report needs a rubric, because there is no single right answer to check against — there are only better and worse ways of doing the work. The two tools work well together: a marking guide spells out the partial credit for short answers, and a rubric judges the open-ended work. Our guide to grading papers faster shows how answer keys, marking guides, and rubrics fit into one grading system.
Analytic vs Holistic Rubrics: Which One Should You Use?
There are two kinds of rubric, and picking the wrong one is the most common beginner mistake. An analytic rubric scores each criterion separately and adds the points up — the kind this guide builds. A holistic rubric gives one overall judgment for the whole piece of work, with a single score and a short description of what work at each level looks like overall.
| Analytic rubric | Holistic rubric | |
|---|---|---|
| How it scores | One score per criterion, added up | One overall score for the whole piece |
| Feedback | Shows exactly which skills are strong and weak | Shows only the overall level |
| Time to build | Longer — every cell needs a description | Shorter — one description per level |
| Time to grade | Slower per paper, but consistent | Fast — one judgment per paper |
| Best for | Essays, projects, presentations, lab reports | Quick checks, short answers, participation, drafts |
Use an analytic rubric for anything worth a meaningful share of the grade — an essay, a project, a presentation. That is where the detailed feedback pays off, because the student can see precisely what to fix: the evidence was a 2, the organisation was a 4, so the next draft needs better evidence, not better organisation. Use a holistic rubric for quick judgments where detailed feedback would cost more time than it is worth: a five-minute exit ticket, a homework check, a first draft you are only reading to see whether the student is on track. A holistic rubric with three levels — strong, adequate, needs work — is enough for those jobs, and it keeps the grading fast.
The worked example below is an analytic rubric, because that is the type teachers search for most often and the type that causes the most confusion. Everything in the six steps applies to both types; a holistic rubric is simply the same process with one row instead of five.
How to Make a Grading Rubric in 6 Steps
Step 1: Start With the Learning Goal
Before you write a single cell, write down in one sentence what the assignment is supposed to prove. Not what the students have to produce — what they have to show they can do. “Write a 500-word essay” is a task. “Build a clear argument and support it with evidence” is a learning goal, and it is the only thing a rubric should measure.
This step matters because it decides everything that follows. If the goal is argument and evidence, then content and evidence are your criteria, and spelling is a minor one. If the goal is a lab report, then method and data handling are your criteria, and the introduction is minor. Teachers who skip this step usually end up grading things they never intended to grade — neat handwriting, long sentences, effort — because those are the easiest things to notice, not the things the assignment was teaching.
Step 2: Pick Three to Five Criteria
Each criterion is one skill or quality you will judge separately. Three to five is the right number. Fewer than three and the rubric is too blunt to be useful — everything collapses into one vague “quality” row. More than five and the rubric becomes a form nobody finishes: the teacher stops reading the cells halfway down, and the student stops reading them halfway across.
Good criteria are observable and non-overlapping. “Content”, “organisation”, “evidence”, “language”, and “mechanics” work for an essay because each one is a different thing you can point at in the work. “Content” and “ideas” do not work as two separate criteria, because they are the same thing written twice — a student who scores well on one will always score well on the other, so you are counting the same skill twice. The same applies to “grammar” and “spelling” as separate rows when a single “mechanics” row would do.
A useful test: can you describe a piece of work that scores high on this criterion and low on another? If you cannot — if every good essay is good at both — the two criteria are really one, and you should merge them. Our guide on how many points each assignment is worth covers the same question from the scoring side: how much each part of an assignment should count.
Step 3: Choose Your Levels — Four Is the Sweet Spot
Most rubrics use four levels of quality, and there is a good reason for it. Three levels is too coarse: the gap between “good” and “weak” is so wide that most students land in the middle and the rubric tells them nothing. Five levels is too fiddly: the difference between a 3 and a 4 becomes a matter of opinion, and two teachers grading the same paper will disagree more often than they agree.
Four levels give you a clear top, a clear bottom, and two useful steps in between. Name them in words your students understand — Excellent (4), Proficient (3), Developing (2), Beginning (1) is a solid set — and avoid labels that judge the student instead of the work. “Poor” describes the student; “Beginning” describes where the work is and where it can go. The same applies to the top level: “Excellent” is a description of the work, not a prize for the student.
Step 4: Write the Descriptors — Say What the Work Looks Like
The descriptors are the cells of the grid, and they are where most rubrics fail. A bad descriptor says “good use of evidence”. A good descriptor says “uses two or more pieces of relevant evidence, quoted or described accurately, and explains what each one proves”. The difference is that the good version can be checked: you can count the pieces of evidence and see whether each one is explained. The bad version cannot be checked, because “good” means something different to every teacher who reads it.
Three rules make descriptors work. First, use observable language — verbs and numbers, not adjectives. “States a clear argument in the first paragraph” beats “has a good introduction”. Second, keep every cell short: one or two sentences at most. A rubric is a lookup tool, not an essay about essays; if a cell takes a paragraph to read, nobody will read it while grading. Third, keep the same structure across a row so the levels are easy to compare. If the top cell for evidence says “two or more pieces of relevant evidence, each explained”, the next cell down should say “one piece of relevant evidence, explained briefly”, not something completely different like “evidence is mostly fine”. The reader should be able to see the staircase: the same quality, weaker at each step down.
Step 5: Assign the Points — Make the Numbers Match What You Value
Points are where a rubric stops being a description and starts being a grade, so they need to reflect what you actually care about. The simplest scheme is equal weights: five criteria, four points each, twenty points in total. It is easy to explain, easy to add up, and fair when every criterion matters about the same amount.
But sometimes one criterion matters more than the rest, and the points should show it. In a persuasive essay, the argument itself matters more than the spelling, so you might give content eight points, evidence six, organisation four, and mechanics two — still twenty points, but now a student who writes beautifully and argues weakly cannot score as highly as a student who argues strongly and spells imperfectly. That is the honest version: the numbers say what you value, and the students can see it.
Whatever scheme you choose, check the arithmetic before you use it. Add up the maximum for every row and confirm it equals the total you promised — twenty points, not nineteen or twenty-one. Then work out what a few realistic scores convert to: 17 out of 20 is 85%, a B; 15 out of 20 is 75%, a C; 12 out of 20 is 60%, a D−. If the conversion surprises you — if a solid essay lands on a grade you would never have given it — the points are wrong, not the essay. Our guide to understanding grade weighting explains the same idea for whole courses: the weight you give something is a statement about how much it matters.
Step 6: Test It on One Real Paper Before the Class Set
Never use a new rubric on a whole class set without trying it first. Take two or three real pieces of student work — one strong, one weak, one in the middle — and score them with the rubric. You will learn more from those three papers than from an hour of staring at the grid.
You are checking three things. First, does the rubric separate the strong work from the weak work? If all three papers land on nearly the same total, the descriptors are too vague or the levels are too close together. Second, can you actually find the right cell for each criterion without guessing? If you keep landing between two cells, one of the descriptions needs rewriting. Third, would another teacher reach the same scores? If you can, hand one paper and the rubric to a colleague and compare totals. A gap of more than two or three points on a twenty-point rubric means the descriptors are still too open to interpretation. Fix the cells, not the teacher.
That test run takes fifteen minutes and saves hours of arguments later. It also saves you from the most common rubric embarrassment: discovering halfway through a class set that one row is broken and having to re-grade everything you have already marked.
Worked Example: A 20-Point Essay Rubric
Here is a complete rubric built with the six steps above. The assignment is a 500-word persuasive essay for a 10th-grade class: students argue for or against a school policy and support their position with evidence. There are five criteria, four points each, for a total of twenty points.
| Criterion | 4 — Excellent | 3 — Proficient | 2 — Developing | 1 — Beginning |
|---|---|---|---|---|
| Content & Argument (4 points) | Clear argument stated in the first paragraph; position is consistent throughout | Clear argument, but it weakens or drifts in one place | Argument is present but vague, or changes halfway through | No clear argument; the essay lists opinions without a position |
| Organisation (4 points) | Ideas follow a clear order; each paragraph has one main point and links to the next | Clear order overall, with one paragraph off-topic or out of place | Some order, but paragraphs jump between ideas | No clear order; ideas appear in random sequence |
| Evidence & Support (4 points) | Two or more pieces of relevant evidence, quoted or described accurately, each explained | Two pieces of evidence, but one is unexplained or only partly relevant | One piece of evidence, or evidence that does not support the argument | No evidence, or evidence that contradicts the argument |
| Language & Style (4 points) | Clear, varied sentences; formal tone suited to the topic throughout | Mostly clear; a few awkward sentences or informal phrases | Frequent unclear sentences; tone slips often | Hard to follow; sentences run on or break off |
| Mechanics (4 points) | No more than one spelling or punctuation error | A few errors (2–4) that do not block meaning | Frequent errors (5–8) that sometimes block meaning | Errors throughout; meaning is often unclear |
Now score three real students against it. Maya scores Content 3, Organisation 4, Evidence 3, Language 3, and Mechanics 4 — a total of 17 out of 20. That is 17 ÷ 20 × 100 = 85%, which is a B on the standard scale. Her feedback writes itself: the argument and evidence need one more step each, while the organisation and mechanics are already strong.
Jordan scores 4, 4, 4, 4, and 3 — a total of 19 out of 20, which is 95%, an A. Only the mechanics row holds him back, and the rubric tells him exactly what to fix: proofread once more before handing in.
Sam scores 2, 3, 2, 2, and 3 — a total of 12 out of 20, which is 60%, a D−. The rubric shows Sam something a bare grade never could: the organisation and mechanics are already passing, so the next draft should focus entirely on the argument and the evidence. That is useful feedback, and it took no extra writing — the rubric cells are the feedback.
Notice what the rubric did in all three cases: it turned one number into five small pieces of information, and it told each student what to do next. That is the difference between a rubric and a score. A score says where you are. A rubric says how you got there and what to change.
How to Turn Rubric Points Into a Grade
Once the rubric gives you a total, the conversion is simple: divide the points earned by the total points, multiply by 100, and you have the percentage. Then match the percentage to your school’s letter-grade scale. On the standard scale this site uses, the 20-point rubric converts like this:
| Rubric score (out of 20) | Percentage | Letter grade |
|---|---|---|
| 20 | 100% | A+ |
| 19 | 95% | A |
| 18 | 90% | A− |
| 17 | 85% | B |
| 16 | 80% | B− |
| 15 | 75% | C |
| 14 | 70% | C− |
| 13 | 65% | D |
| 12 | 60% | D− |
| 11 or below | 55% or below | F |
For a quick conversion, the Letter Grade Calculator turns any percentage into a letter grade, and the Test Grade Calculator does the same from raw points — enter 17 correct out of 20 and it returns 85%, a B, in seconds. If the rubric score is one assignment among many, add its points to the rest of the classwork in the Class Grade Calculator, or use the Grading Calculator for a single-score conversion. For mixed-mark tests — some questions worth two marks, some worth five — the same principle applies: add the marks first, then convert the total, exactly as the EZ grader chart does for whole-class scoring.
One thing to decide in advance: what happens to a rubric score that falls on a boundary? A student on 18 out of 20 is exactly 90%, an A−, but a student on 17.5 is not possible on this rubric — every criterion scores a whole number, so totals are always whole numbers. That is a deliberate feature of a 4-point-per-criterion design: no half points, no rounding arguments, no “but I was only half a mark off”. If you do allow half points, say so in the rubric itself, and decide the rounding rule before grading starts.
Common Rubric Mistakes to Avoid
Too many criteria. Seven rows feel thorough and grade like a tax form. Keep it to three to five; if a sixth criterion is genuinely important, ask whether it belongs in a separate rubric for a separate assignment.
Vague descriptors. “Good use of evidence”, “adequate organisation”, “poor effort” — none of these can be checked. If a descriptor could mean three different things to three different teachers, rewrite it with verbs and numbers until it means one thing.
Uneven levels. A rubric where the top level is “perfect” and the second level is “mostly wrong” has a cliff in the middle, and most students will fall off it. Each step down should be a small, visible drop — one fewer piece of evidence, one more error — not a different planet.
Points that do not match your values. If mechanics is worth the same as content, students will spend as much time proofreading as thinking. Weight the rows to match what the assignment is teaching, and say so plainly.
Keeping the rubric secret until after grading. A rubric handed out with the graded paper is a verdict. A rubric handed out with the assignment is a map. Students who see the rubric before they start write better work, because they know what good looks like — and they argue less about the grade, because they saw the standard coming.
Copying a rubric for a different assignment. A rubric built for a persuasive essay will not fit a lab report, a presentation, or a creative-writing task, even if the rows look similar. The criteria have to match the task. Borrow the structure, rewrite the cells.
Never testing it. The first use of a new rubric always reveals a broken cell — a description that does not fit any real paper, a level nobody lands in, a criterion two teachers score differently. Test on two or three real papers first, fix what breaks, and then use it on the class.
Frequently Asked Questions
How many criteria should a rubric have?
Three to five. Fewer than three is too blunt to give useful feedback, and more than five makes the rubric slow to use and hard for students to read. If you keep wanting a sixth row, check whether it overlaps with one you already have — most sixth criteria turn out to be a second name for an existing one.
How many levels should a rubric have?
Four is the sweet spot for most assignments: excellent, proficient, developing, and beginning. Three levels work for quick checks and younger students, where a simpler scale is easier to understand. Five levels are worth it only when you genuinely need to distinguish fine differences, such as in advanced or exam-level work.
Should students see the rubric before they start the assignment?
Yes — that is one of the main reasons to use one. A rubric given out with the assignment tells students exactly what good work looks like, which is far more useful than telling them after the grade is already decided. Teachers who share the rubric in advance consistently report fewer grade complaints, because the standard was visible from the start.
What is the difference between a rubric and a marking guide?
A marking guide lists the right answers and the partial credit for each one — it suits short-answer and calculation questions, where answers are right or wrong. A rubric describes levels of quality — it suits essays, projects, and presentations, where there is no single right answer. Most teachers need both: a marking guide for the objective half of a test and a rubric for the open-ended half. Our guide to grading papers faster shows how the two fit together in one marking session.
Can I use the same rubric for different assignments?
Only if the criteria genuinely match. A rubric for a persuasive essay can usually be reused for another persuasive essay with small changes to the descriptors. It cannot be reused for a lab report or a presentation without rewriting the rows, because the skills being judged are different. Borrow the structure — the four levels, the point values, the layout — and rewrite the cells to fit the new task.
How do I turn rubric points into a percentage and a letter grade?
Divide the points earned by the total points and multiply by 100. A score of 17 out of 20 is 17 ÷ 20 × 100 = 85%, which is a B on the standard scale. The Test Grade Calculator does this conversion instantly from any points total, and the Teacher Grader gives you the same result with a full score table beside it — handy when you are converting a whole class set of rubric totals at once.
A grading rubric is a small thing to build — six steps, one test run, about half an hour for your first one and much less after that — and it pays for itself every time you grade. It makes your marking faster, because you are matching work to descriptions instead of deciding from scratch. It makes your grades fairer, because the same standard applies to the first paper and the thirtieth. And it makes your feedback useful, because the student can see exactly which row to improve. Start with the worked example above, change the criteria to fit your assignment, test it on one real paper, and hand it out with the task instead of with the grade. Your students — and your evenings — will notice the difference.